Connect to Zoom
What you’ll need
- A Zoom account (free or paid plan)
- A Spir account
- Spir app approval on the Zoom Marketplace
How to connect your Zoom and Spir accounts
Follow the steps below to connect your Zoom and Spir accounts.
- Log in to Spir (or sign up if you don’t have an account)
- Click on your Spir account icon and click on “Account settings.”
- Click on “Connect” next to Zoom under connected services. Click on “OK” when the confirmation dialogue pops up.
- Sign in to your Zoom account. (*Skip this step if you’re already signed in.)
- Select “Allow” on the Zoom account verification page.
Using Spir with Zoom
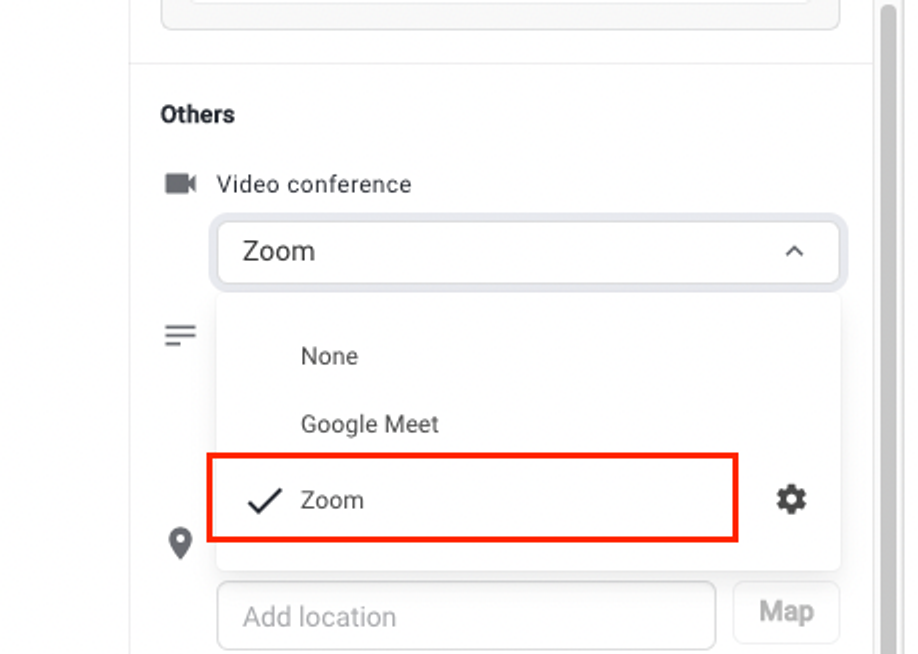
Clicking on the “Web conference” tab on events, templates, scheduling, and group polls will show the Zoom option.

A Zoom URL will be issued after you save your event or after you confirm the date and time for templates, scheduling, and group polls. (Details of the confirmed event will be sent by email when the date and time are confirmed.)
How to disconnect your Zoom and Spir accounts
Follow the steps below to disconnect your Zoom and Spir accounts.
- Click on your Spir account icon and click on “Account settings.”
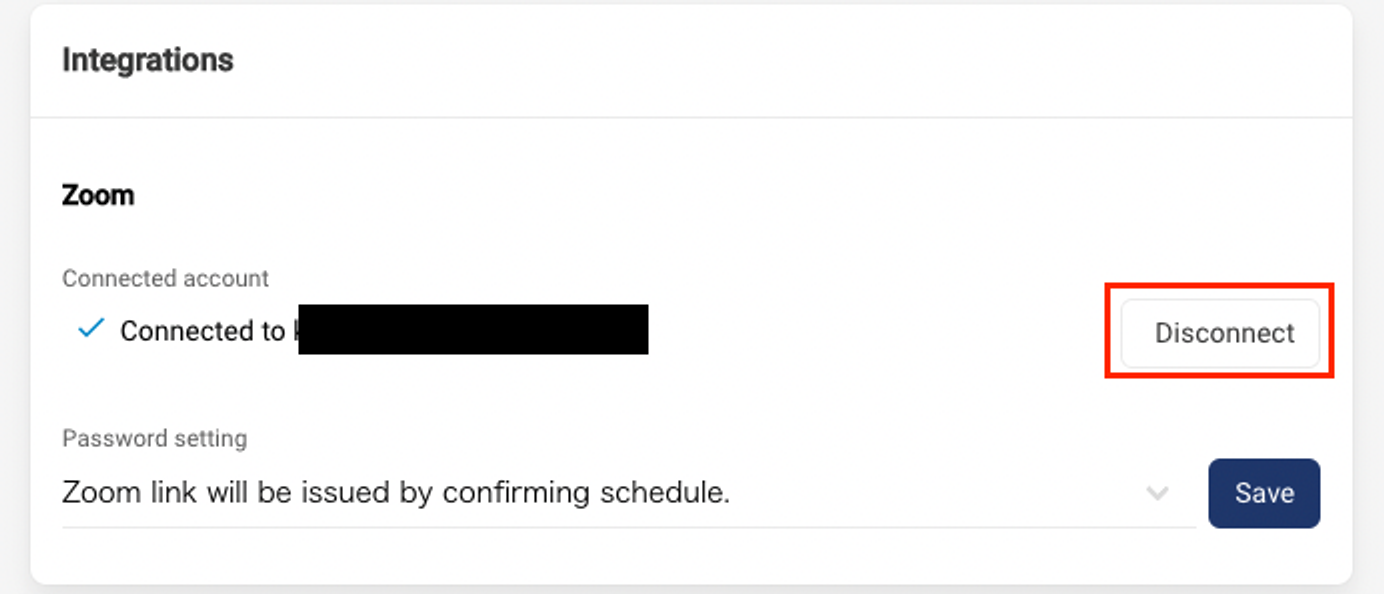
- Click on “Disconnect” next to Zoom under connected services.

FAQ
Q. I can’t approve the Spir app on the Zoom App Marketplace.
A. Approving the Spir app on the Zoom App Marketplace requires admin permissions on the Zoom account. If you don’t have the necessary permissions, ask the Zoom account admin for approval.
Q. Can I link the same Zoom account on multiple Spir accounts?
A. You cannot link the same Zoom account to multiple Spir accounts. If you connect the same Zoom account to a separate Spir account, the original Spir account will be disconnected, and an email will be sent to notify you that the account has been disconnected.
Q. Do other parties to the schedule have to connect with Zoom as well?
A. Other parties are not required to connect to Zoom to confirm the date and time of the event. Only the organizer is required to connect to Zoom for scheduling to automatically issue Zoom URLs.